Chapter 3.3
Captured · Installation & Setup
Complete Jetpack CRM’s onboarding wizard so its CRM tables and dashboard are ready for MBOS.
Navigate: WordPress Dashboard → Configuration → Jetpack CRM → Dashboard
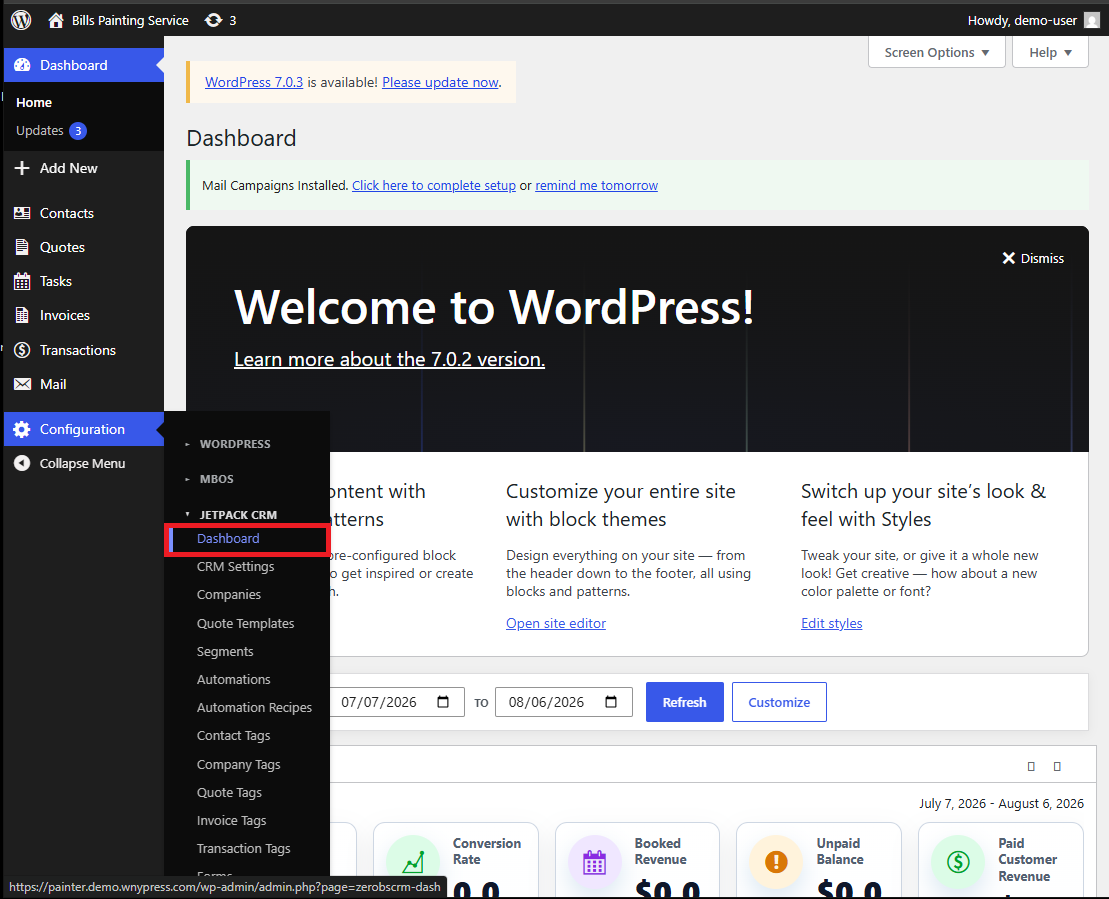
What does this control?
Jetpack CRM must complete its first-run wizard before MBOS imports CRM-dependent templates, tags, automations, and mappings.
How do I complete it?
- Open Configuration → Jetpack CRM → Dashboard.
- Select Next on each of the four onboarding screens.
- Select Finish and go to your CRM! on the final screen.
Why is this useful?
Completing the wizard establishes Jetpack CRM’s initial configuration and provides MBOS with a ready CRM environment.
How do I verify it?
- Jetpack CRM opens to its dashboard rather than the onboarding wizard.
- The Contacts, Quotes, Tasks, Invoices, and Transactions menus are available.
Important:
- Required sequence: Next → Next → Next → Next → Finish and go to your CRM!