Chapter 3.5
Captured · Installation & Setup
Validate and apply the approved MBOS seed package to reconstruct the demonstration website and operating configuration.
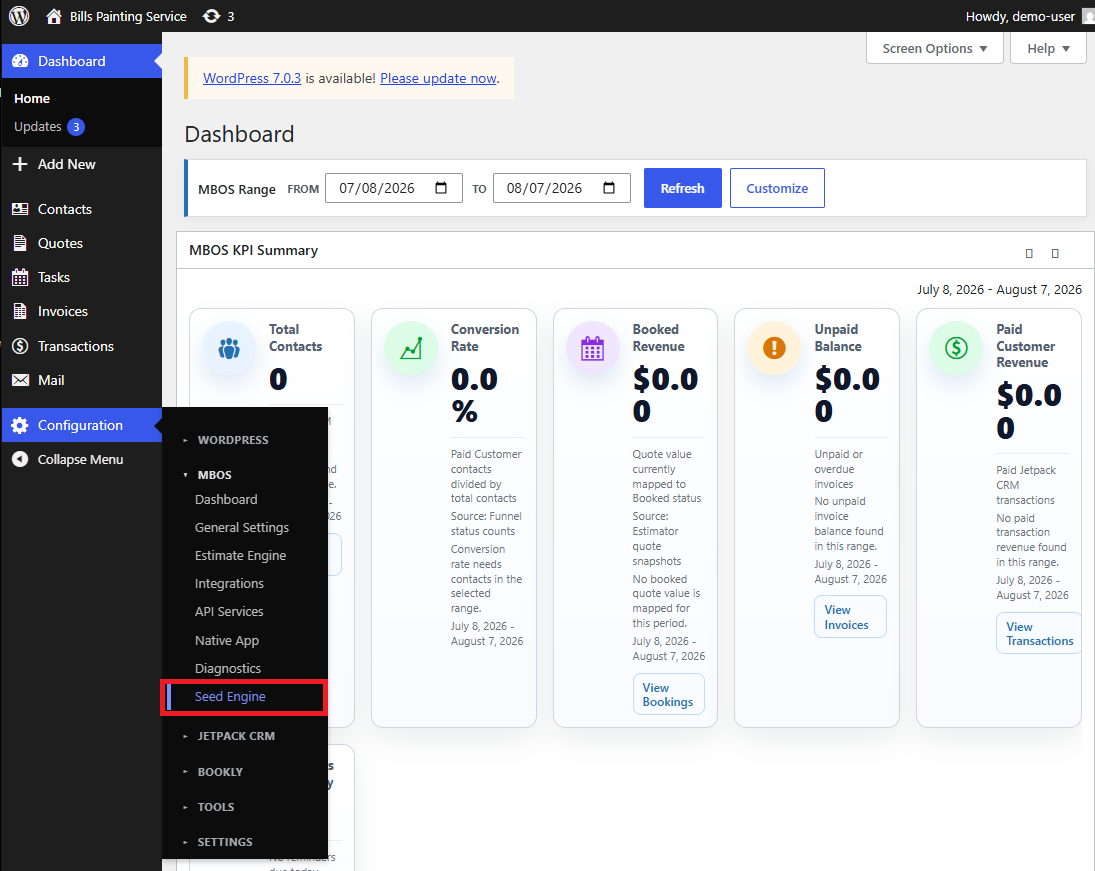
Navigate: WordPress Dashboard → Configuration → MBOS → Seed Engine
What does this control?
The Seed Engine reconstructs seed-owned pages, settings, services, templates, and integrations without copying private customer or transactional data.
How do I complete it?
- Open Configuration → MBOS → Seed Engine.
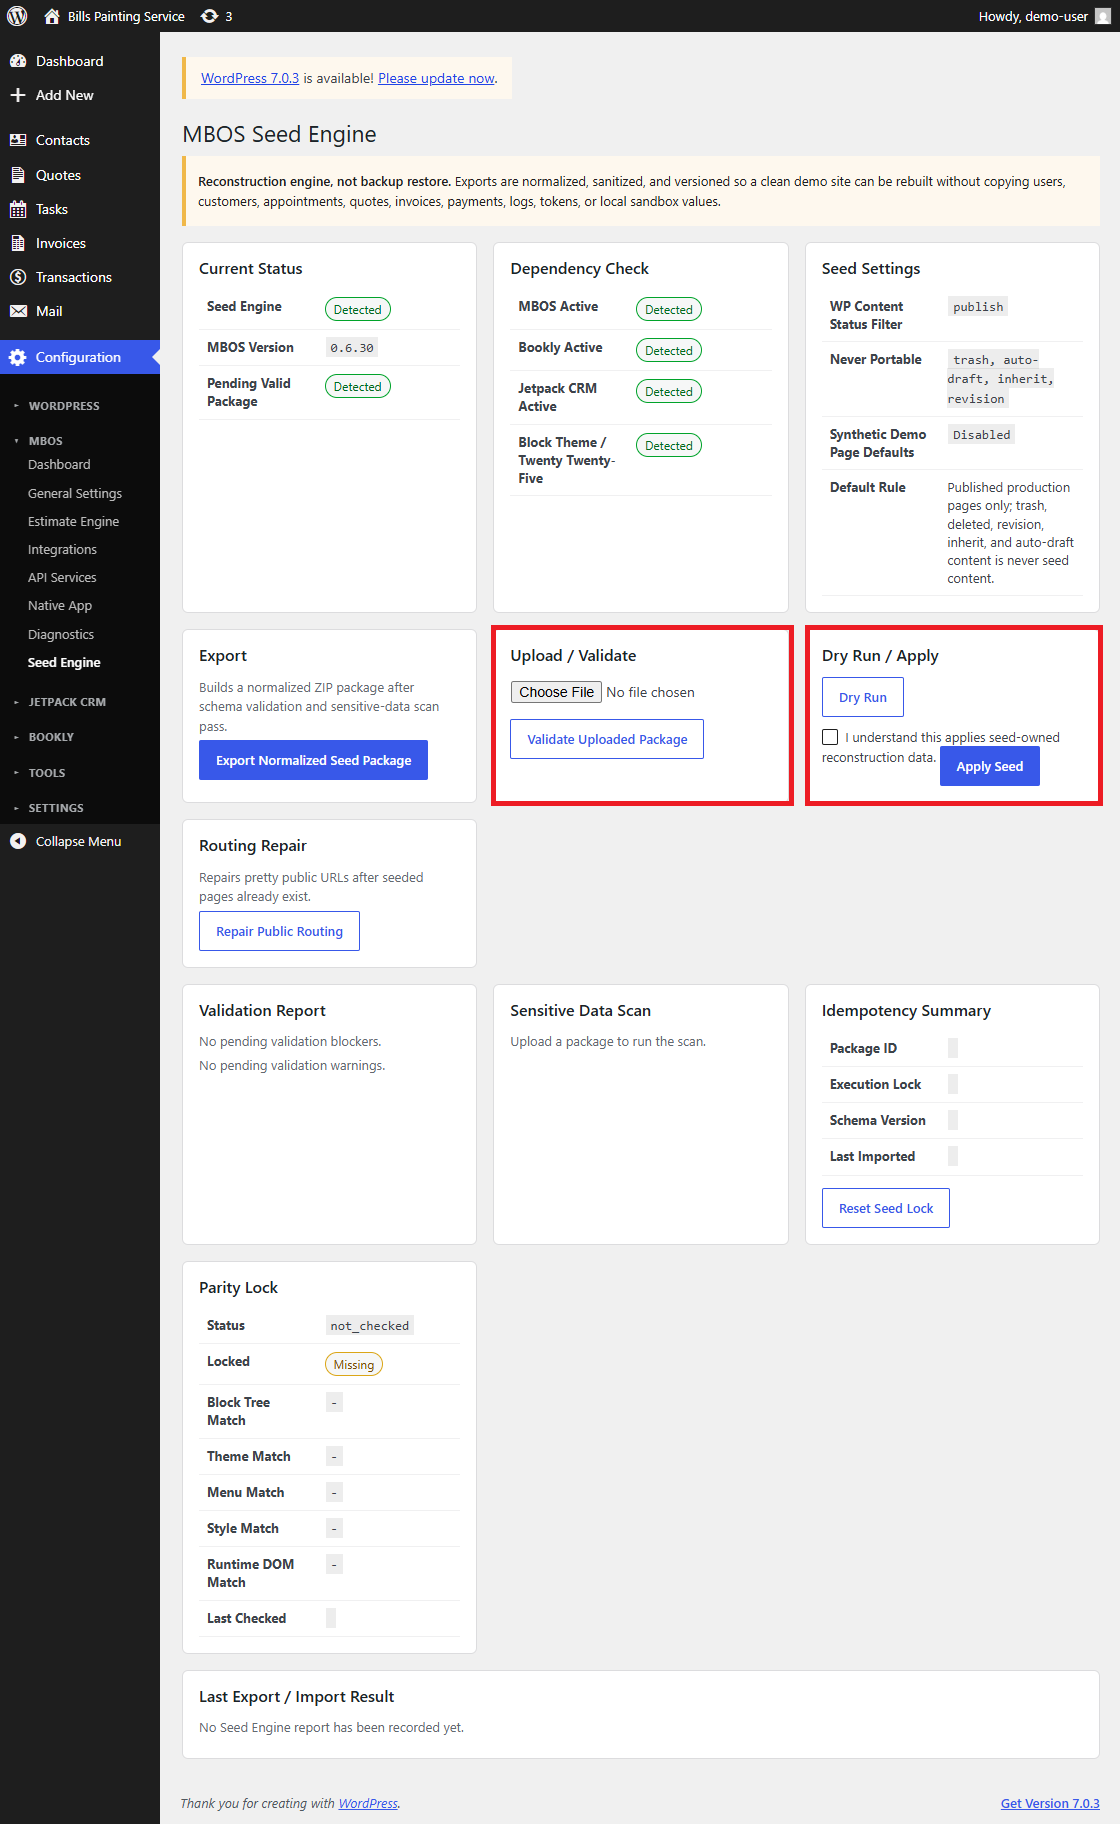
- Confirm the Dependency Check reports MBOS, Bookly, Jetpack CRM, and the active block theme as Detected.
- In Upload / Validate, select Choose File and upload the approved MBOS seed ZIP package.
- Select Validate Uploaded Package.
- Review the Validation Report and Sensitive Data Scan. Resolve any blocker before continuing.
- Select Dry Run and review the predicted changes.
- Select the acknowledgment checkbox labeled I understand this applies seed-owned reconstruction data.
- Select Apply Seed and wait for the import to finish. Do not close or refresh the page.
- Review Last Export / Import Result and confirm the package completed successfully.
- Use Repair Public Routing only when seeded pages exist but their public URLs do not resolve correctly.
Why is this useful?
Validation and dry-run checks help prevent a damaged, incompatible, or unsafe package from changing the site.
How do I verify it?
- The Current Status panel shows a detected Seed Engine and valid package state.
- The Validation Report contains no blockers.
- The final import result reports success.
- Seeded pages, service cards, settings, templates, and automations appear as expected.
- Open the public website and test its primary navigation and landing page.
Important:
- The Seed Engine is a reconstruction tool, not a backup-restoration tool.
- Never apply a seed package that fails validation or reports sensitive data.
- A second screenshot in this article shows the validation, dry-run, and apply controls.